Re-run an allocation recommendation
Intended audience: clinical services coord - csc
The allocation recommendation can be re-run multiple times for a consented organ, to obtain new ranked lists of eligible recipients.
This may be required in cases where:
A newly identified HSH or high status liver patient gets listed in the Canadian Transplant Registry (CTR).
Significant information about the donor or organ is changed on OATS. The allocation recommendation may be re-run to ensure the new information is properly factored into the recommendation.
Re-running an allocation recommendation
Pre-requisite: An allocation has already been run for the consented organ.
To re-run an allocation recommendation:
-
Go to the donor profile, then select Organ > Allocation / eOffer on the left side of the page.

-
The available allocation controls change to allow you to re-run the allocation

Select the Re-Run Allocation Recommendation button.
-
The system asks for confirmation that the allocation is to be re-run.

-
Select:
OK to continue.
Cancel to return to the previous step
When a previously executed allocation is re-run, the system will create a new allocation recommendation list carrying over all proposed offers (primary and back up), accepted offers (primary and back up), declines, and no offers from the previous allocation.
If a recipient with an accepted offer in the previous allocation list is excluded when the allocation is re-run, the system will display a pop-up,
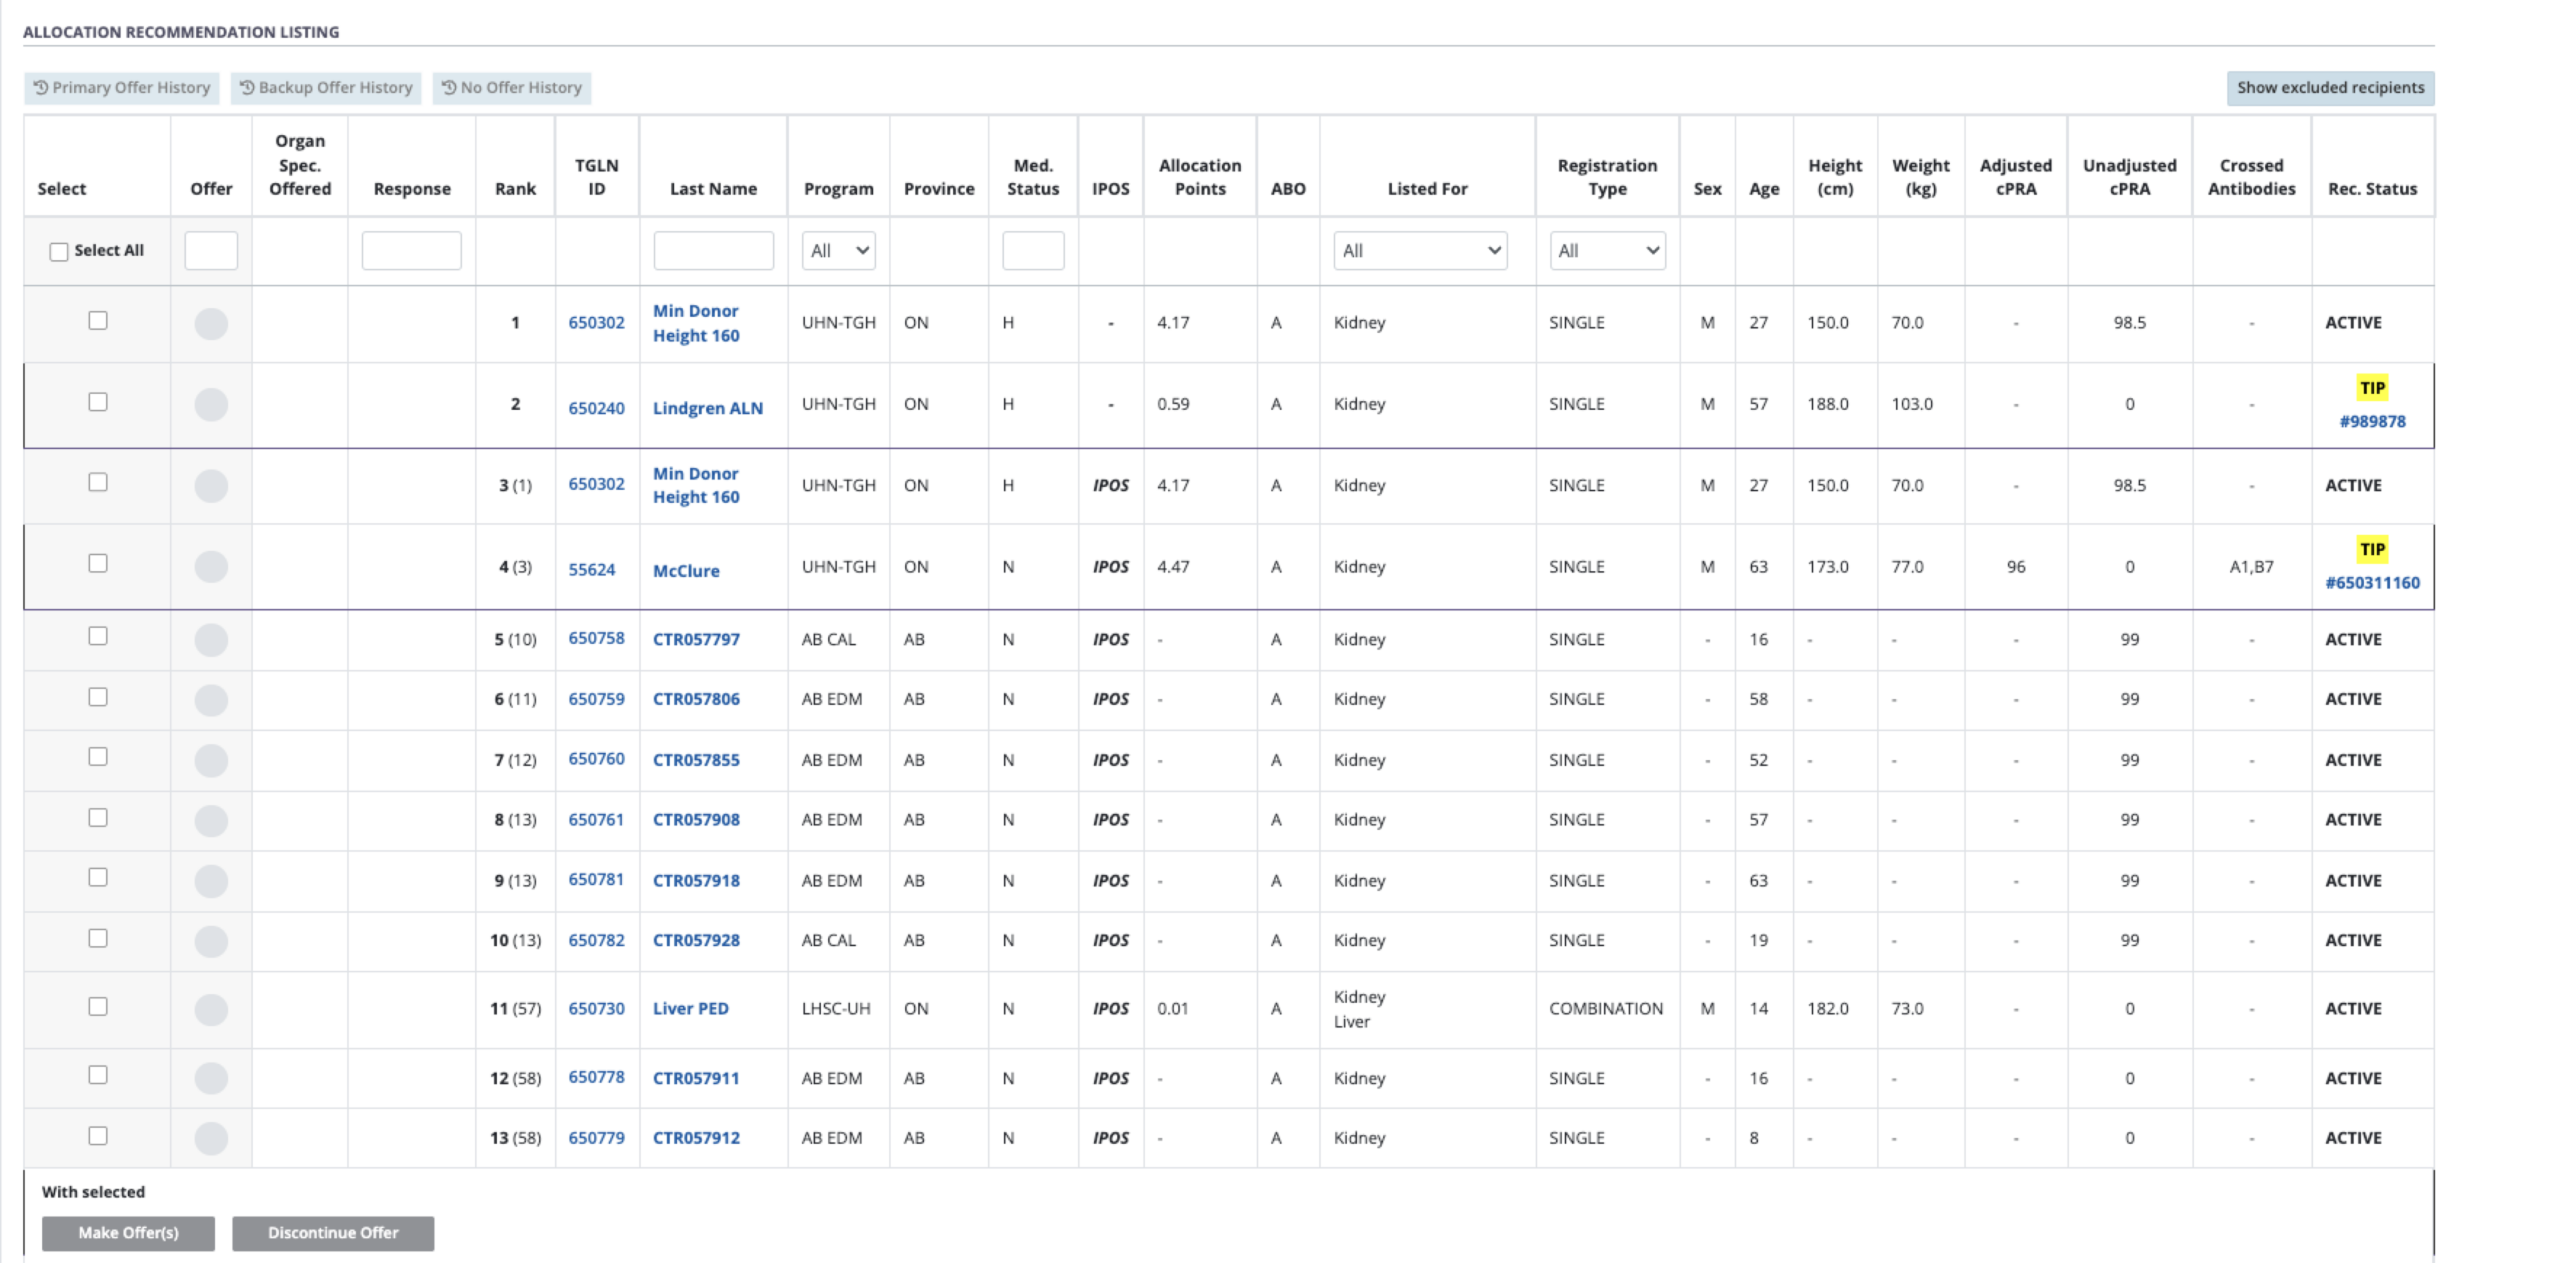
Newly added recipient(s) in the Allocation/eOffer will be displayed as a highlighted row in red.
The system compiles, filters, and ranks all eligible organ recipients.
The system expands the Allocation/eOffer section to show the new allocation recommendation.
Expanded Allocation/eOffer section
-
Allocation Controls with new options:

-
Allocation Details with the unique Allocation ID and other allocation-specific information.

-
Access to Checklists.

-
Allocation Recommendation Listing with a ranked list of recipients.
Re-running an allocation with new Exceptional Distribution (ExD)
If an allocation is re-run after ExD is applied and offers have already been accepted, the system will:
-
When an allocation is re-run due to a Donor with Exceptional Distribution (ExD) update from ‘No’ to ‘Yes’, an ‘Accept ExD’ button will add to the recipient row in the “Offer Response” section
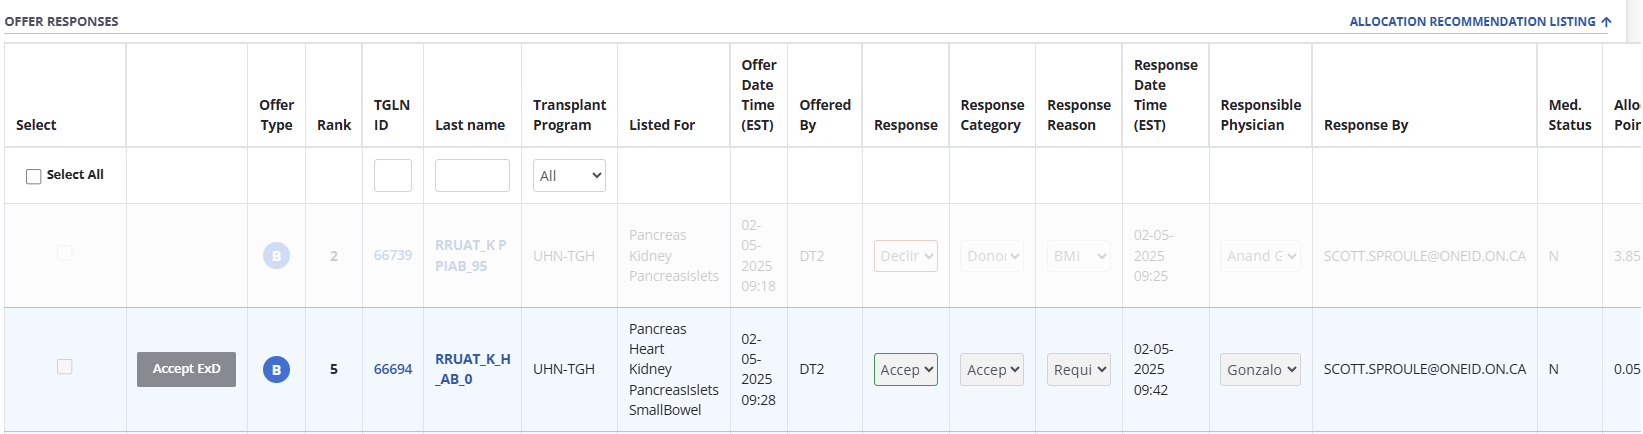
When the “Accept ExD” button is selected, an offer confirmation pop-up opens to identify that this offer is being accepted despite the ExD.
-
The system presents an exceptional distribution confirmation window.
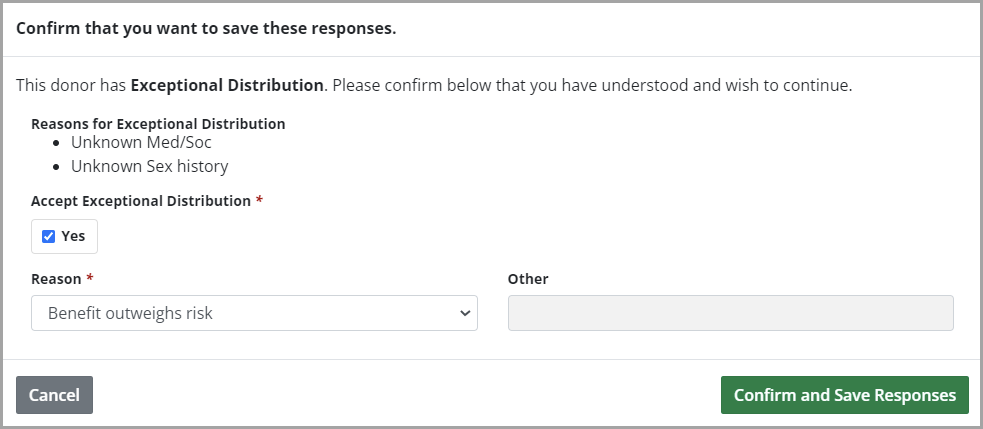
Select Yes under Accept Exceptional Distribution.
Select a Reason from the dropdown.
Provide addition detail if Reason is Other.
-
Select the Confirm and Save Responses button.
Select the Cancel button to close the window without accepting the ExD offer.